
So-Brite
Power Injection for LED Runs That Actually Work
Jun
A lighting job can look perfect at the controller and fall apart 40 feet later. The usual culprit is voltage drop, and that is exactly why power injection for LED runs matters on real installations. If you install permanent exterior lighting, strip lighting, or landscape accent systems, getting this right protects the look of the project and your margin.
Too many installers learn the lesson after the fact. The first section of the run is bright and clean, then the far end shifts color, loses intensity, or starts behaving unpredictably under full output. The fix is rarely complicated, but it does require planning. Power injection is not a nice extra. On longer runs, it is part of building a system that performs the way you sold it.
What power injection for LED runs actually does
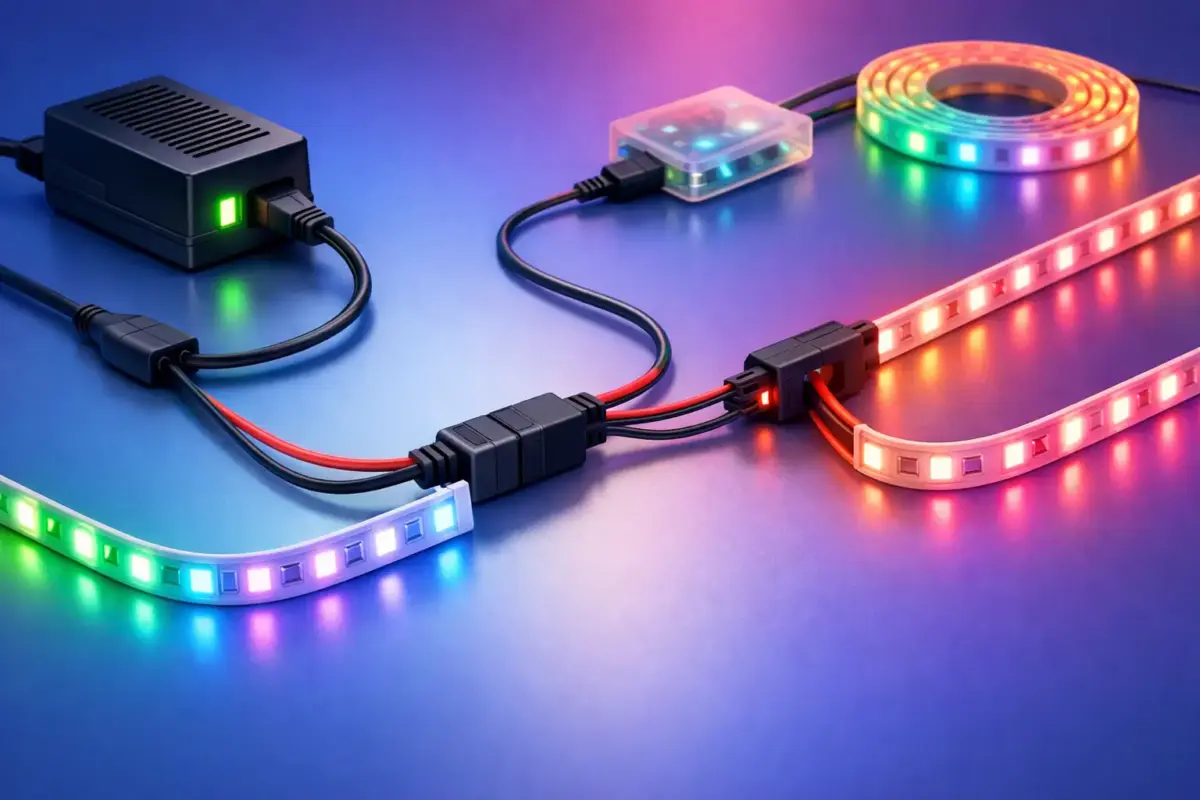
Power injection means adding power at one or more points along an LED run so the lights receive stable voltage across the full length. You are not changing the visual design. You are correcting the electrical reality behind it.
As current travels through wire and LED boards, voltage gradually drops. The longer the run and the higher the load, the more noticeable the drop becomes. On low-voltage systems, even a modest loss can show up fast. White may turn warm, colors may drift, and animations may become inconsistent. In premium exterior lighting, those flaws are not small details. They are the difference between a professional result and a callback.
For dealers and installers, the business case is simple. Better power distribution means fewer service issues, more predictable installs, and cleaner finished projects that generate referrals. It also gives you confidence when quoting larger homes, commercial facades, patio zones, and perimeter lighting layouts where run length can get away from you quickly.
Why long LED runs fail without support
The first problem is brightness loss. LEDs at the front of the circuit often receive higher voltage than LEDs at the end, so the run becomes visibly uneven. On white output this usually shows up as dimming at the far end. On RGB or RGBW systems, the issue is often more obvious because color balance starts to shift.
The second problem is system instability. Controllers, amplifiers, and pixels can act erratically when voltage falls below the range they expect. Effects may lag, flicker, or fail only at certain brightness levels, which makes troubleshooting harder. A system that seems fine during a quick daytime test can reveal its weaknesses at night when every channel is driven harder.
The third problem is reputation. Exterior lighting buyers are paying for impact, reliability, and year-round performance. If an install has visible inconsistency, the customer does not care whether the root cause was wire gauge, run length, or inadequate injection planning. They just see a premium product that does not look premium.
When power injection is needed
There is no single footage number that applies to every product. It depends on voltage, wattage per foot, wire gauge, control method, and how the run is physically laid out. That is why experienced installers avoid one-size-fits-all rules.
A 24V strip may travel farther than a 12V strip before problems appear. A lower-density run may behave better than a high-output run of the same length. Permanent holiday lighting with individually addressable nodes has its own limits, especially when animations and full-brightness scenes increase current demand. The practical takeaway is that you should plan power based on load calculations and manufacturer guidance, then verify with real-world testing.
If a run shows dimming, color shift, flicker at the far end, or inconsistent behavior at high brightness, you are already in power injection territory. But the smarter move is to anticipate those issues before install day. That saves labor, protects the finish quality, and keeps the job moving.
How to plan power injection for LED runs
Start with the total load. Know the wattage or amperage of the product per foot or per node, then multiply by the planned run length. Add appropriate overhead rather than sizing the power supply right at the edge. Outdoor systems face temperature swings, long cable paths, and future service realities. Headroom matters.
Next, map where voltage drop is most likely to appear. That usually means looking at the total distance from the power source to the farthest section of the run, not just the illuminated length itself. Installers sometimes underestimate the effect of feed wire distance between the power box and the lights. On a house outline or landscape layout, those hidden lengths add up.
Then decide where to inject. In some layouts, feeding from both ends of a run is enough. In others, especially longer rooflines, linear strip sections, or commercial spans, you may need mid-run injection points. The goal is balanced voltage distribution, not simply adding more hardware.
Wire size matters here. If the cable feeding the run is undersized, adding an injection point without upgrading the conductor may not solve the root issue. Good power planning is a system decision. Power supply capacity, wire gauge, connection quality, and weatherproofing all have to work together.
Common injection layouts
End-feed plus opposite-end injection is common for straightforward linear runs. Center-feed layouts can work well when the design branches in two directions. Mid-run injection is often the answer when neither end can carry the load effectively on its own.
What matters most is not the diagram on paper but the actual voltage at the load. If you test only at the power supply, you can miss the problem entirely. Measure where the LEDs are receiving power, especially at the points most likely to sag under full output.
Mistakes that create callbacks
One common mistake is assuming brighter products always mean better results. Higher-output LEDs draw more power, which increases the need for sound distribution design. If you upgrade the fixture or strip spec without revisiting power planning, the install may underperform even though the product itself is excellent.
Another mistake is mixing components with mismatched expectations. Different voltages, inconsistent connectors, or questionable accessories can introduce voltage loss and failure points. For professional exterior work, weatherproof construction and dependable connection methods are not optional. A weak splice or low-grade extension can undo an otherwise solid design.
The third mistake is treating power injection as a field patch instead of a design step. When crews improvise after the fact, cable routing gets messy, waterproofing suffers, and labor hours rise. A clean install is usually the result of deciding injection locations before mounting begins.
The trade-off between fewer components and better performance
Every installer wants efficiency. Fewer power supplies and fewer injection points can mean faster installs and lower material cost. But there is a line where simplification starts hurting performance. If you stretch a run beyond what it can reliably support, the savings disappear in troubleshooting time and service calls.
That does not mean every project needs an elaborate power architecture. It means the right design should match the scope of the job. A modest patio or short eave section may need very little support. A larger residence, clubhouse, restaurant frontage, or layered landscape project demands more attention. The profitable move is not to overspec everything. It is to spec intelligently.
For growing dealers, this is where supplier quality matters. When your product catalog includes premium lights, compatible power boxes, extension cables, caps, and control components designed to work together, planning gets simpler. That is one reason professional installers move toward a one-source model instead of piecing together systems from mixed vendors.
How power planning helps you sell better installs
Customers may never ask about voltage drop, but they absolutely notice uneven color and dim sections. When you can explain that your system is designed for consistent performance across the full run, you position yourself differently from lower-priced competitors who are only talking about footage and app features.
It also helps on larger quotes. If a prospect wants a long roofline, extensive pathway lighting, or color-changing accents across multiple elevations, power planning allows you to say yes with confidence. You are not just selling lights. You are selling a dependable finished result.
In markets with harsh sun, heat, and long exterior exposure windows, that reliability matters even more. Installers working around Phoenix know outdoor conditions do not forgive weak components or sloppy electrical planning. Stable power and weather-ready hardware protect the system after the sales presentation is over.
A practical standard for your crew
The strongest crews make power injection part of their process, not a judgment call left to chance. They calculate load before install, account for cable distance, choose the right wire, verify manufacturer limits, and test under real brightness conditions before they leave the site.
That discipline pays off in cleaner night demos, fewer punch-list items, and stronger word-of-mouth. It also makes scaling easier. When your team follows a repeatable approach to power injection for LED runs, larger projects stop feeling risky and start looking like growth.
If you want premium lighting jobs to perform like premium lighting jobs, treat power as part of the product, not just the thing behind it.
